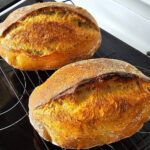
This is a super easy sourdough loaf. I used it as a “test” loaf for a new starter and when I simply fancy a good old fashioned easy sourdough bake.
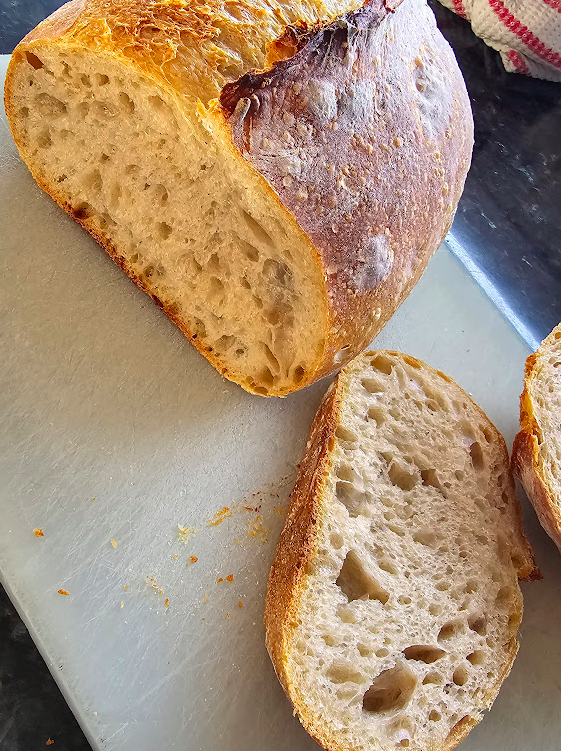
Once completely cooled, slice it THEN freeze it. That way you can just take out one or two or however many slices you need. Great for those chunky rustic sandwiches and even more delicious toasted golden brown with butter and your topping of choice.
For flour I’m using a blend 75% of Farmers Mill Titan strong bakers flour which is grown in South Canterbury, milled in Timaru and has a protein percentage of 11.6. The other 25% is Minchins Milling High Grade White, Or their Wholemeal Wheat Flour which is also locally grown and milled in Sheffield, Canterbury with a particularly high protein content of 14.8 percent. While it’s not high extraction it does have lovely wee flecks of germ and imparts an nice “not quite white” colour to the crumb. Combined these flours gives me a 13.2% protein flour. My starter is fed exactly the same ratio of flours.
Sourdough Loaf
Ingredients
- 125 gm Sourdough Starter active and recently fed
- 250 gm Water 25-28c temp adjust qty slightly depending on flour
- 400 gm Bread Flour get the flour to room temp overnight
- 9 gm Salt
Instructions
- Your starter should be active and vigorous. Feed it late evening of the day before you want to bake and leave in a warm place overnight. Feed again very early in the morning then let it double. It should double in size within 3 hours or so.
- I like to measure my flour and water and the evening before and leave it all in my prooving box to get up to temperature overnight. If your flour is cold it will affect the dough temperature and slow the prooving down.
- Once your starter has doubled mix together the water and starter. Your starter should float in the water if it's ready. Mix the starter and water first then add the flour and salt. Mix well by hand or use a stand mixer for 5-10 minutes for better results.
- Mix well, scrape down bowl and rest for 30 minutes.
- Stretch and Fold the dough, then rest for 45min. I do a coil fold at each stretch.
- Stretch and fold 3 more times. Then bulk proove for 2 hours.
- Preshape the dough with a coil fold then rest uncovered another 15 minutes.
- Do a final coil fold trying to avoid degassing the dough then load into floured bannetons (I use rice flour to prevent sticking), with the seam side up (ie the top of your loaf is at the bottom of the banneton to pick up that nice rattan shape). At this point you can roll in seeds such as sesame poppy etc.
- Allow to proof another 2-3 hours until almost doubled in size then refrigerate overnight.
- 1 hour before baking get your oven preheating to 250c. It needs a full hour to heat the baking stones and dutch oven properly.
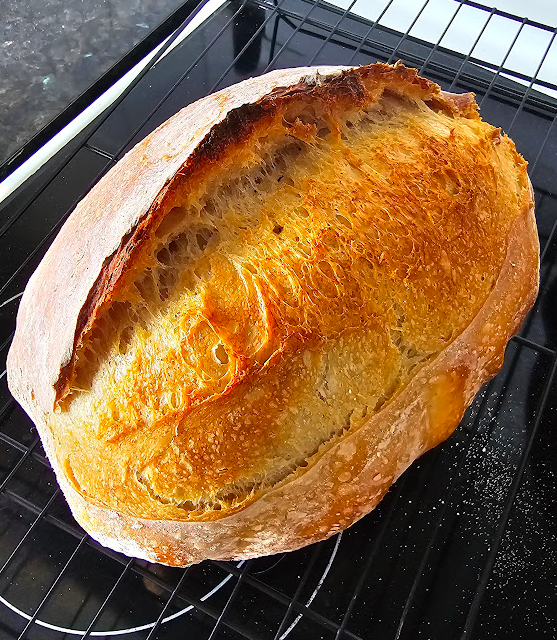
- Bake time, transfer out dough to parchment paper. I usually sprinkle a small amount of semolina onto the paper before turning out the dough. Score with a bakers lahm, then load into the screaming hot preheated dutch oven. Spritz well with water then quickly cover to trap the steam and return to oven.
- Bake for 20 minutes with lid on. Remove lid and bake another 15-20 minutes until desired level of scorch is reached.
- Remove from oven and allow to cool FULLY on a wire rack. Don't be tempted to slice into your newly baked loaf of bread till it's cool. It's still cooking while it's cooling down and your patience will be rewarded if you wait.